
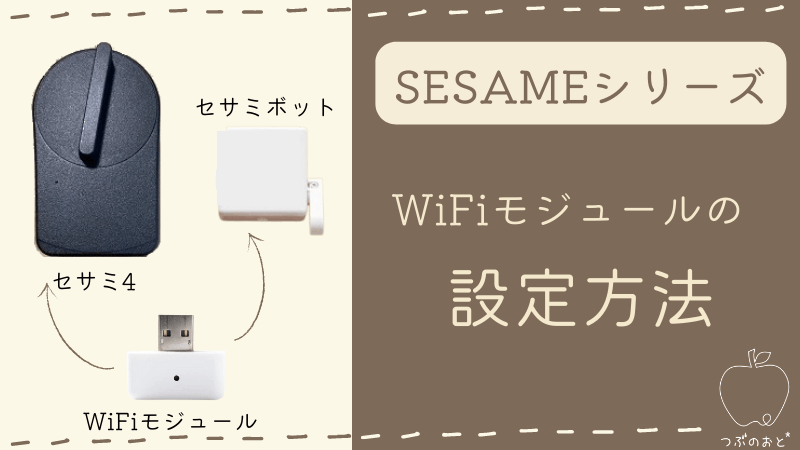
WiFiモジュールはセサミ4やセサミボットと一緒に使うことで、世界中どこにいてもスマホで操作できるようになる優れものです♪
WiFiモジュールを買ったけど、設定方法がわかりにくい!
そんなあなたに画像をたくさん使って設定方法を紹介します。
わが家はWiFiモジュールなしでSESAME4(セサミ4)を10ヶ月使っていましたが、先日WiFiモジュールデビューしました。
 のこ
のこ一度使うとWiFiモジュールのない生活には戻れません。
使ってわかったメリットも紹介します。
WiFiモジュールはセサミ4を世界につなぐ優れもの
セサミ4はスマートロックです。
玄関などの鍵に設置すると、スマホで鍵の開け閉めができます♪
WiFiモジュールなしでも使用できるけど、Bluetoothの届く範囲でしか使えません。
それを世界中どこにいてもスマホで操作できるようにするのがWiFiモジュールなんです。
WiFiモジュールなしでSESAME4を使っている様子はこちらから
WiFiモジュール設定方法

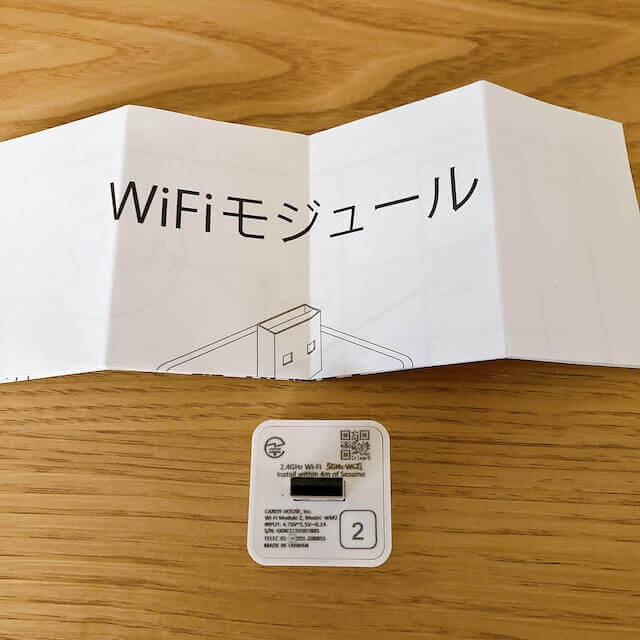
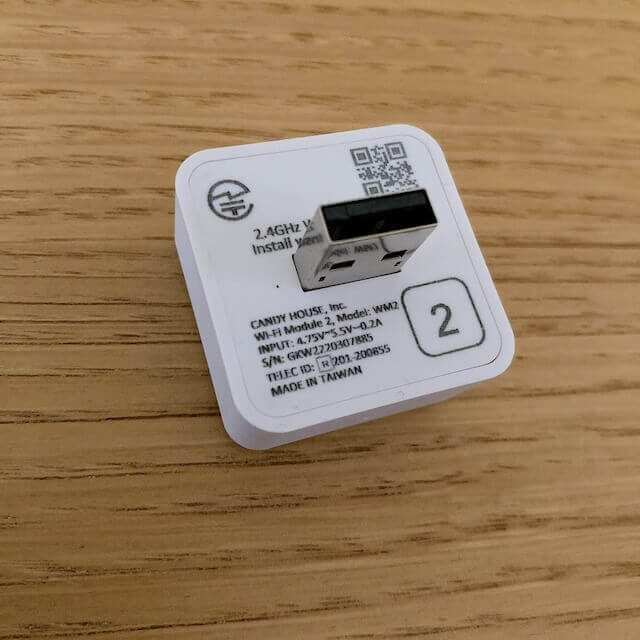
箱を開けるとwifiモジュール本体と取扱説明書が入っています。
取扱説明書にQRコードがついていて、そこから設置方法のページを見ることができます。
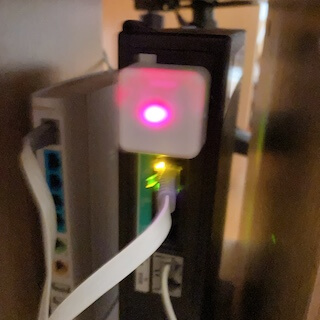
わが家はソフトバンクのホームゲートウェイのUSBポートに設置しました。
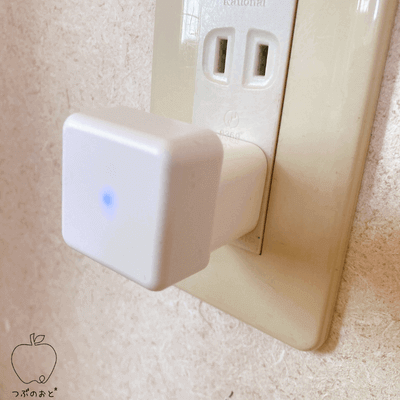
設定前は紫のランプが点灯します。
 のこ
のこ画像がぶれててごめんなさい
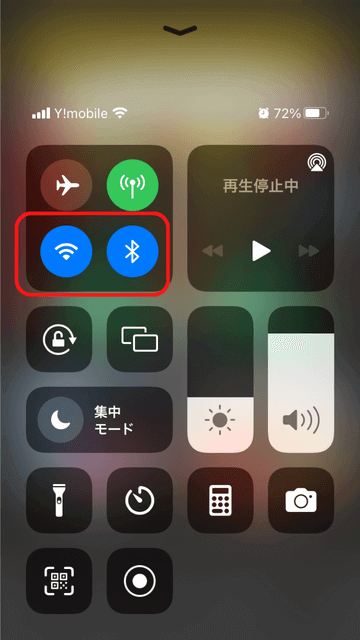
Wi-FiとBluetoothの設定をONにしましょう。

SASAME OS2(新アプリ)をたちあげましょう。
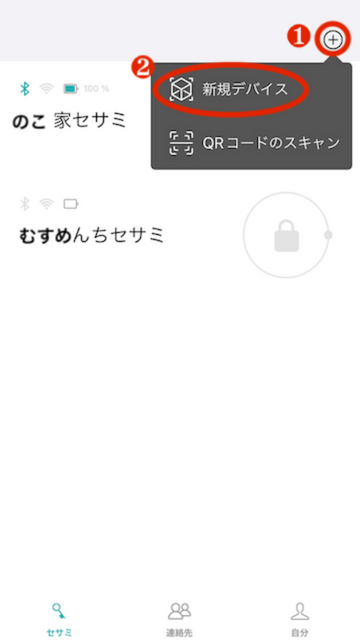
「+」を押して、新規デバイスを選択しましょう。
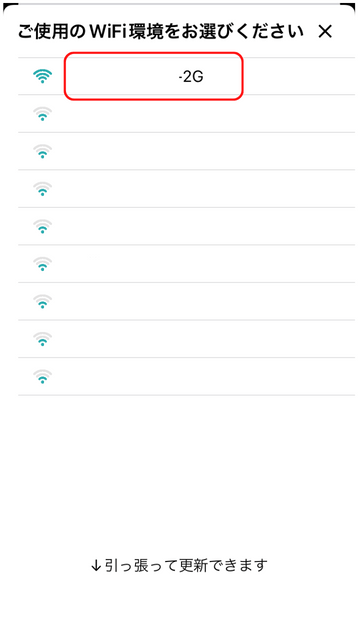
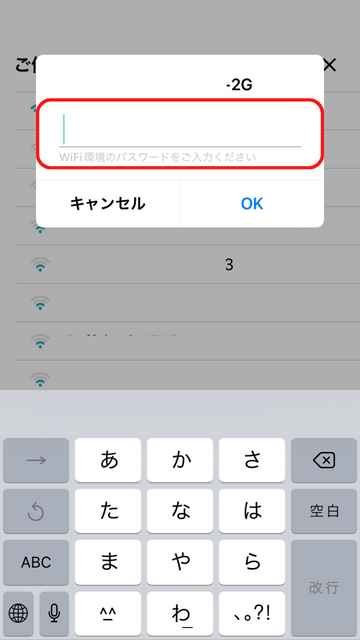
Wi-Fi接続時のパスワードを入力しましょう。

ネット接続状態が全部青色になったのを確認してから、「セサミを追加」を押しましょう。
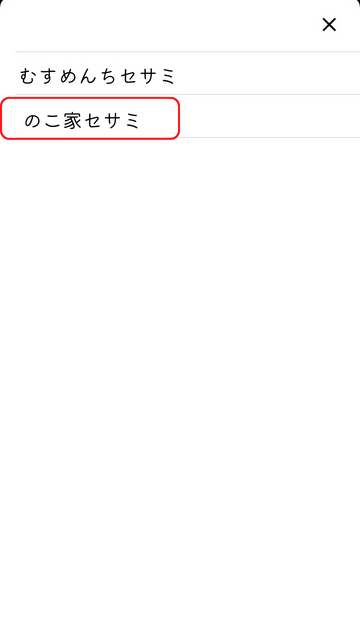
ペアリングさせたいセサミデバイスを選び、クリックしましょう。

これでアプリの設定は完了です。
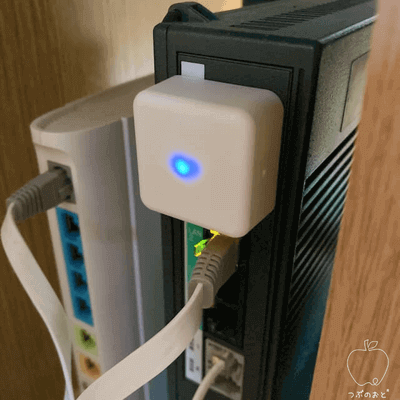
アプリの設定が完了すると、WiFiモジュールのランプが青になります。
WiFiモジュールのLEDの色が変わる様子
赤く点灯しているLEDが青に変わり、赤の点滅が少し続いて青に変わります。
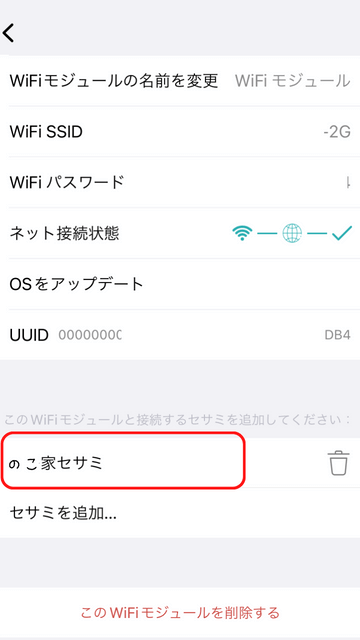
*「WiFiモジュールの名前を変更」をクリックすると、好きな名前に変えられます。
 のこ
のこわが家は「ワイ吉」にしました。
WiFiモジュールの設置場所
USBポートのある下記の範囲なら好きなところに設置できます。
WiFiモジュールの設定環境
①2.4GHzのWi-Fiネットワーク
②セサミデバイスのBluetoothが届く場所にWiFiモジュールを設置する。(推奨:4m以内)
③自宅のWi-FiルーターをWi-Fiモジュールが接続できる範囲に設置する。
④固定IPは対応外となりますので、動的IPにて設定を行なってください。
わが家が試してみたのはこの4箇所
- ノートパソコン
- USBアダプターとつなげてコンセント
- ソフトバンクの光BBユニット
- ソフトバンクのホームゲートウェイ
 のこ
のこわが家はソフトバンクのネット環境を利用してます
ノートパソコン
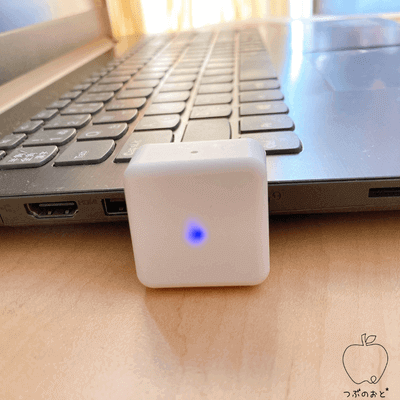
ノートパソコンのUSBに繋いで見ました。
ちゃんとLEDが青になったので、設置できます。
 のこ
のここの使い方はしないだろうけど、試してみました
USBアダプターとつなげてコンセント
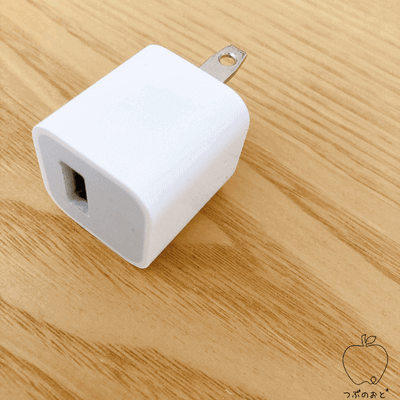
USBアダプターにつなげてコンセントに挿してみました。
ちゃんと青いランプになりました♪
ソフトバンクの光BBユニット
唯一つながらなかったのがソフトバンクの光BBユニット。
反応が全くありませんでした。
つながらないものなのか?この光BBユニット自体がおかしいのか、わからないです。
のここれ以外にもやり方があるので、原因の追求はしませんでした
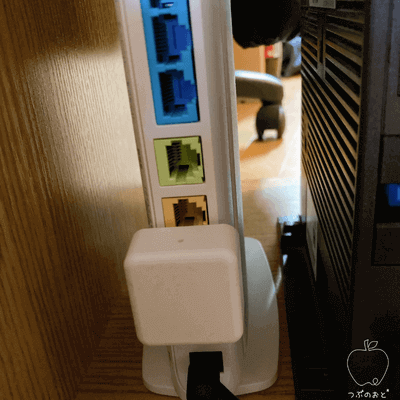
ソフトバンクのホームゲートウェイ
わが家はここに設置しました。
のこ一番邪魔にならない♪
WiFiモジュール リセットのやり方
万が一設定を失敗した時や、新しく設定し直したいときはWiFiモジュールをリセットできます。
方法はとっても簡単♪
WiFiモジュールをリセットする方法
- WiFiモジュールを電源に挿す
- WiFiモジュールの上の小さい穴をクリップのような細い棒で長押しする
- LEDライトが消灯したら離す
- LEDライトが紫色に点灯したらリセット完了!
わが家はつまようじでリセット作業しました。
画像が粗くてごめんなさい。
WiFiモジュールのメリット

WiFiモジュールを設定したとたん、メリットばかりでした。
のこSESAME4と一緒に買っておけば良かったなぁ・・
どこでも開け閉めできる
今まではBluetoothの届く距離だったので、家の外でも少し離れたところに駐車すると車内からはSESAME4を使うことはできませんでした。
それが、ちょっと離れたところどころか、職場でも旅先でも開け閉めできるんです。
のこ便利すぎます
どこでも確認できる
つい先日、SESAME4を使おうとアプリを立ち上げたら、玄関開きっぱなしでした。
何事もありませんでしたが、WiFiモジュールがあれば離れていても鍵の状態を把握することができます。
これからはいつでもどこでも確認できるので、心配ありません。
いつでも安心できる
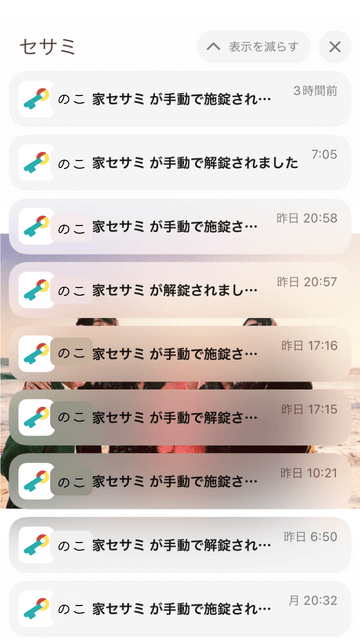
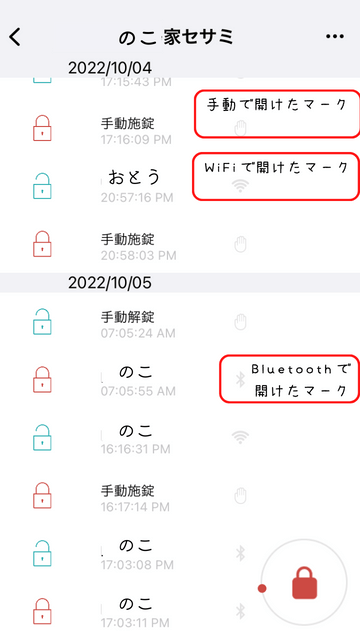
WiFiモジュールがあれば、鍵の開け閉めの通知を受け取ることができます。
誰が開け閉めしたかとか、手動で開けた場合も通知がきます。
離れたご両親などの玄関などに設定すると、離れていても様子を知ることができるなぁと思いました。
まとめ

SESAME4をWiFiモジュールなしで使って10ヶ月。
WiFiモジュールを使ったとたん、本当に便利なので一緒に買うべきだったなと後悔しました。
今からのSESAME4との生活をWiFiモジュールと一緒に楽しんでいきたいと思います。


コメント