

スマートロック【SESAME4】を買ったけど、設置やアプリの設定が不安・・。
そんな方のために【SESAME4】の設置方法を画像付きで紹介します。
わが家の場合のツマミの高さを調節し、金属の土台も使用した設置方法でした。
わが家がやってしまった本体設置時の失敗やアプリ設定時の失敗も記録しておきます。
SESAME4の設置の時困ったな‥という方の参考になればうれしいです。
新作【SESAME4】の紹介はコチラ
SESAME4を設置してみた
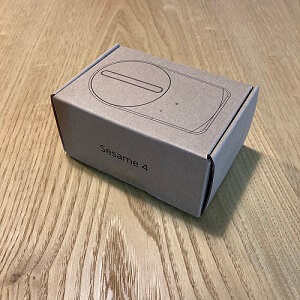
こんな箱に入っていますよ。
かわいいです。
 のこ
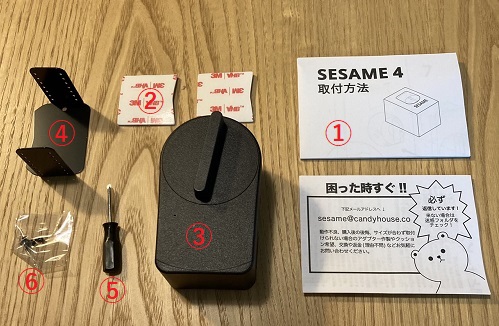
のこ付属品を確認しよう
- ①取扱説明書
- ②セサミ4用3Mテープ(2回分)
- ③セサミ4本体(電池入り)
- ④金属製土台アダプター
- ⑤セサミ4用ドライバー 1本
- ⑥金属製土台アダプター用ネジ(4個・1セット)
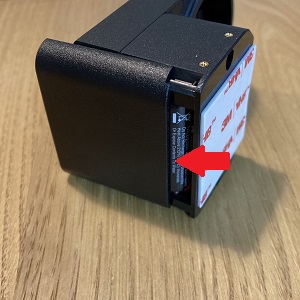
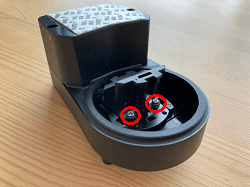
ココをスライドして開けましょう。
電池はもともとセットされています。
赤い矢印の絶縁シート部分を引いて電池のセットをしよう
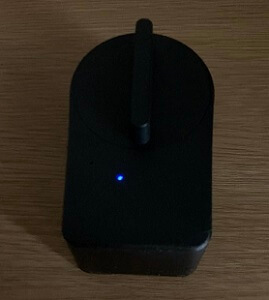
青いランプがつくのを確認しよう
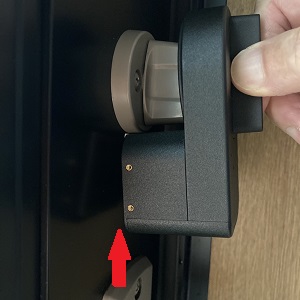
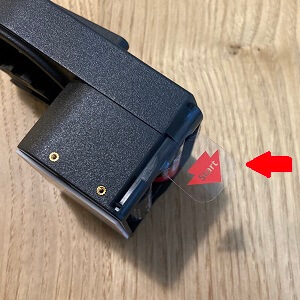
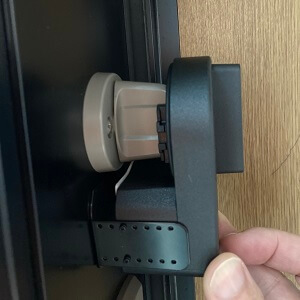
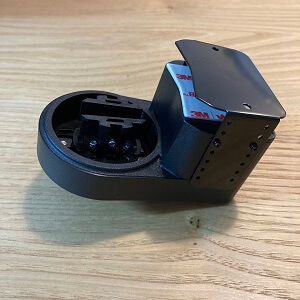
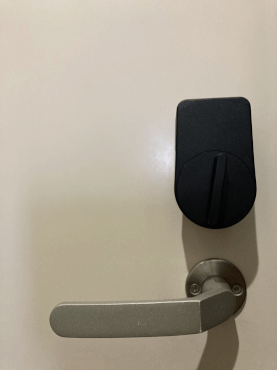
実際にSESAME4を合わせてみます。
①わが家のカギはツマミの部分が長く、矢印のところに隙間があくので、金属製土台アダプターを取り付けることにしました。
②つまみの部分ももう少し深くかませたかったため、高さの調整もすることにしました。
金属製土台アダプターを仮につけたSESAME本体をカギに合わせ、高さを決めたら、取り付けていきます。
ネジ4本でしっかり固定しましょう。
これで高さはOK♪
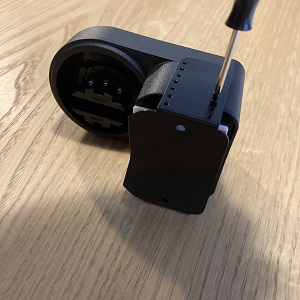
赤丸の2か所のネジを付属のドライバーではずします。
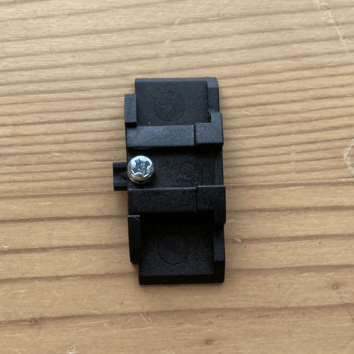
下向きのネジ2本をはずすとこの部分がとれます。
ここについいるネジもはずしましょう。
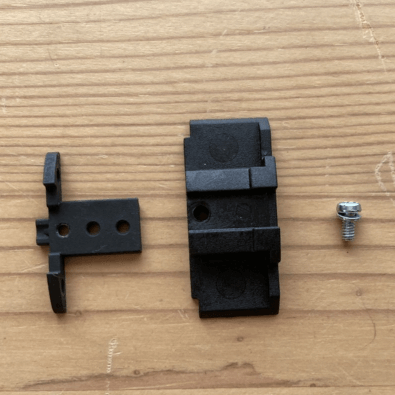
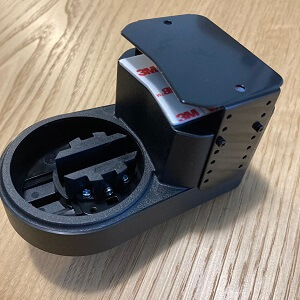
ネジをはずすとこうなります。
左の部品の3つの穴で、高さを調節します。
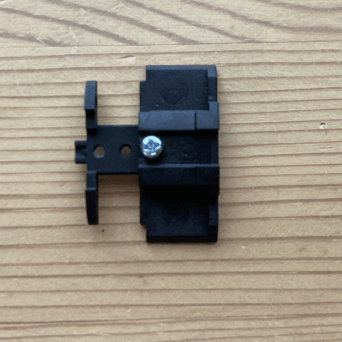
高さを調節したらネジをしめます。
我が家は一番高く調節しました。
この部品をネジ2つ締めてもどし、もう片側も高さを調節します。
高さの調節はこれで完了です。
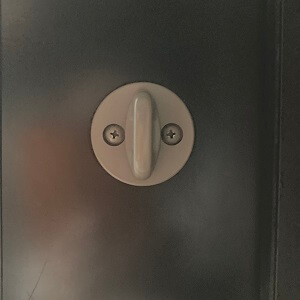
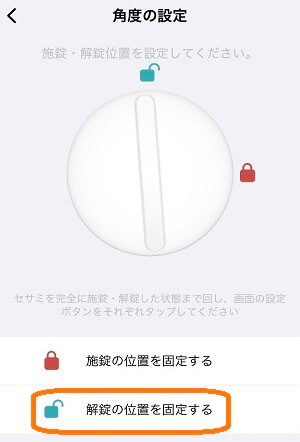
最後に鍵の回転軸が合っていることを確かめてから、手動で解錠・施錠できるかを確認しましょう
ドアの設置面をアルコールで吹きましょう。
*ほんとは設置位置にマークをつけるんだけど、2回目という変な自信からつけ忘れました。
 のこ
のこマスキングテープでマークをつけると、ドアを傷つけたり汚したりしないよ。
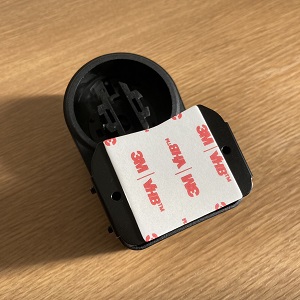
金属土台アダプターに 3Mテープ を貼ります。
3Mテープをはがし、SESAME4を張り付けます。
30秒ほどぎゅっとしっかり押し付けましょう。
これで完成です。
我が家のやってしまった失敗談!その①
セサミ4の設置の向きを間違えました。
電池の取り換えのことを考えたら、上面や横の面に電池の部分がくる方が取り替えやすいですよね。
 のこ
のこ2度目の設定なのに、失敗しました(涙)
皆さん、設置の向きは気を付けてくださいね♪
アプリの設定
ここだけ、注意して設定しましょう♪
最初にセサミに登録したスマホがオーナーになります。
のこアプリを設定するときは必ずオーナーにしたいスマホで登録しましょう

取扱説明書のQRコードを読み込み、アプリをダウンロードしましょう。
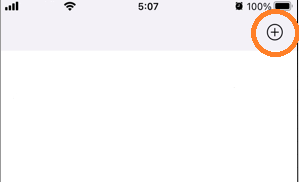
アプリを開くとこんな画面です。
右上の「+マーク」を押します。

「新規デバイス」を選びます。

セサミを登録しましょう。
鍵のシェアの権限について
SESAME4でカギをシェアする際、選択肢が3つ出てきて、権限がそれぞれ違います。
- オーナー:全ての管理が可能(オーナー、マネジャー、ゲストの鍵のシェア、削除)
- マネジャー:マネジャーキー、ゲストキーの鍵のシェア、削除
- ゲスト:ゲストキーの鍵のシェア、削除。 遠隔(WiFiモジュール経由)での操作不可
我が家が設定時に失敗したこと
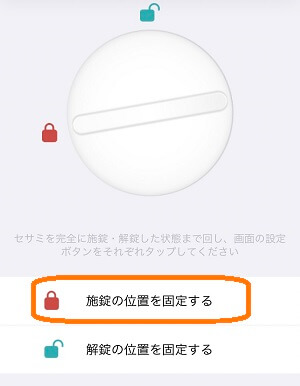
わが家はアプリの施錠や解錠の位置設定をSESAME4本体を家のカギに合わせずに手で回して行いました。
のこSESAME3でも設置してるから、こんな感じだったよね。
というノリで設定したら、いざSESAME4を家のカギに合わせて施錠を確認すると、SESAME4が回らないんです!!
ウィ・ウィーーンと苦しそうな音を出すけどカギが回らない!!
 のこ
のこなんで???
 おとう
おとうあ!カギが回る方向が違うんじゃないかな
SESAME本体をカギに合わせず、本体だけを回して設定したので、逆に回して設定していました。
それは、SESAME4もウィ、ウィーンと苦しそうな音を出すわけです。
 のこ
のこだってSESAME4が設定した方向に鍵が回らないんだもんね
解決策
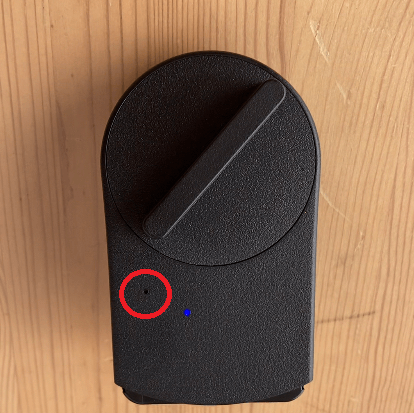
赤くかこったところに穴があります。
クリップもしくはSIMピンで、青いランプが消灯するまで押し続けます。
のこわが家はクリップやSIMピンが見つからず、つまようじでリセットしました
SESAME4リセットの様子を動画にしました
のこ青いランプが約3秒点灯してから消灯します。
これでリセット完了です♪
まとめ
取り付けは簡単ですが、2回目の設置という甘さからミスが目立ちました。
我が家の失敗はコレ
- SESAME4を取り付ける向きが上下逆だった
- SESAME4を実際のカギに合わせずにアプリ設定を行った
今回は、Wi-Fi モジュール は購入しませんでしたが、帰宅時、車の中からSESAME4でカギを開け、スムーズに家に入れることがとても嬉しいです。
かばんからカギを探す手間やじゃらじゃらついてるカギの中から家のカギを探す手間がなくなり、カギのストレスから解放されました。
のこ両手が荷物でいっぱいでも、カギが開いているからドアを開けるだけでOK!
わが家がWi-Fiなしで使っている状況を知りたい方はこの記事をどうぞ


コメント